Are you looking for news about the Raspberry Pi 3B+? Take a look here.
Some huge news for you today.
The Raspberry Pi Model B+ becomes available today – the Foundation has just made the official announcement.
So, what can we expect from the B+? I was fortunate enough to be supplied with a board by the Foundation a couple of days ago so I thought I’d take you round it and show you the differences between the current model B and the new board.
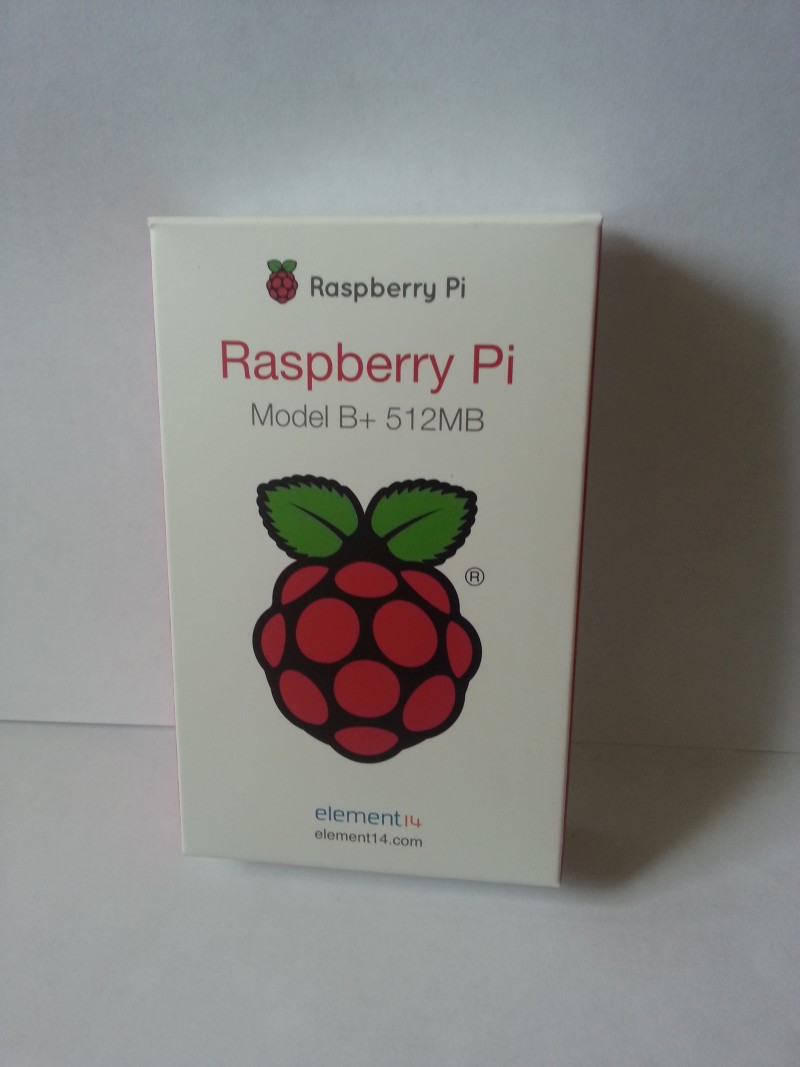
The B+ I have came from Farnell/Element 14 and they’ve done a really nice job with the new packaging:
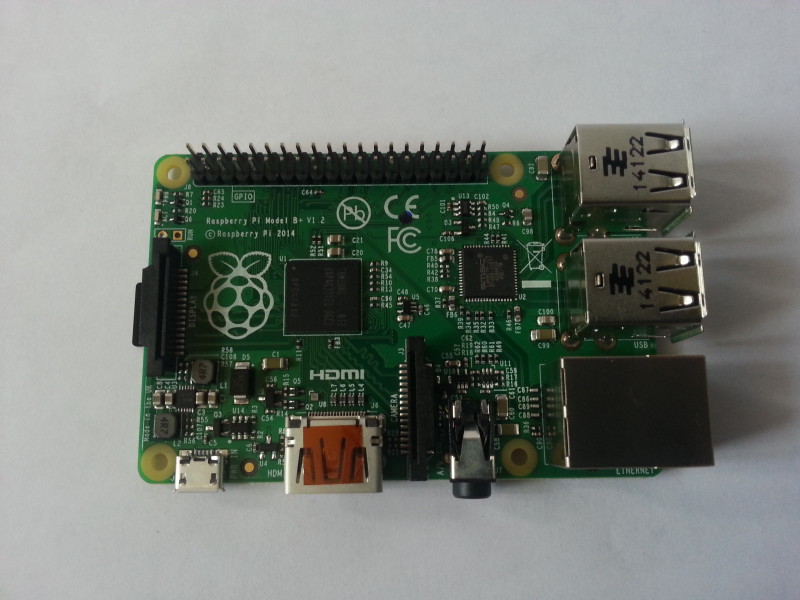
- 4 USB ports – for the first time, you’ll be able to have a keyboard, mouse and wifi dongle plugged in without needing a powered hub. Bear in mind, you will probably need a more powerful power supply for the B+ if you want to use all 4 ports. They’re recommending a 2A supply. Of course, if you’re just using a mouse and a keyboard then a 1A supply will probably be absolutely fine.
- Better USB hot plug capability – you should be able to plug in your wifi dongles in without reboots!
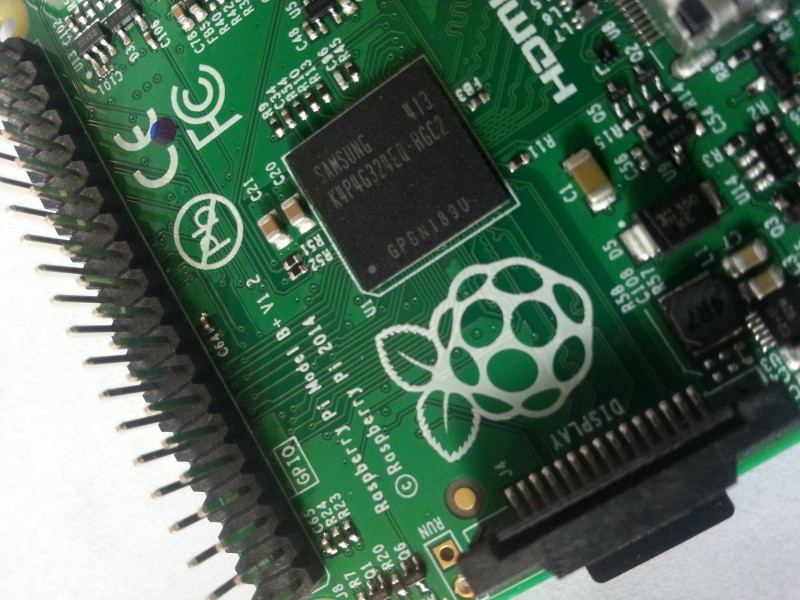
- A new Ethernet port with activity lights.
- The USB and Ethernet ports are now all in a straight line, rather than in the B’s staggered arrangement.
- The yellow composite video port has gone and there is now a combined 3.5mm jack that provides audio and the analogue video signal.
- The HDMI port, the CSI (camera) and DSI (display) ports have all moved slightly.
- The micro USB power socket has changed sides. This means that all the ports are on the same side of the Pi – so cable management is much better with the B+.
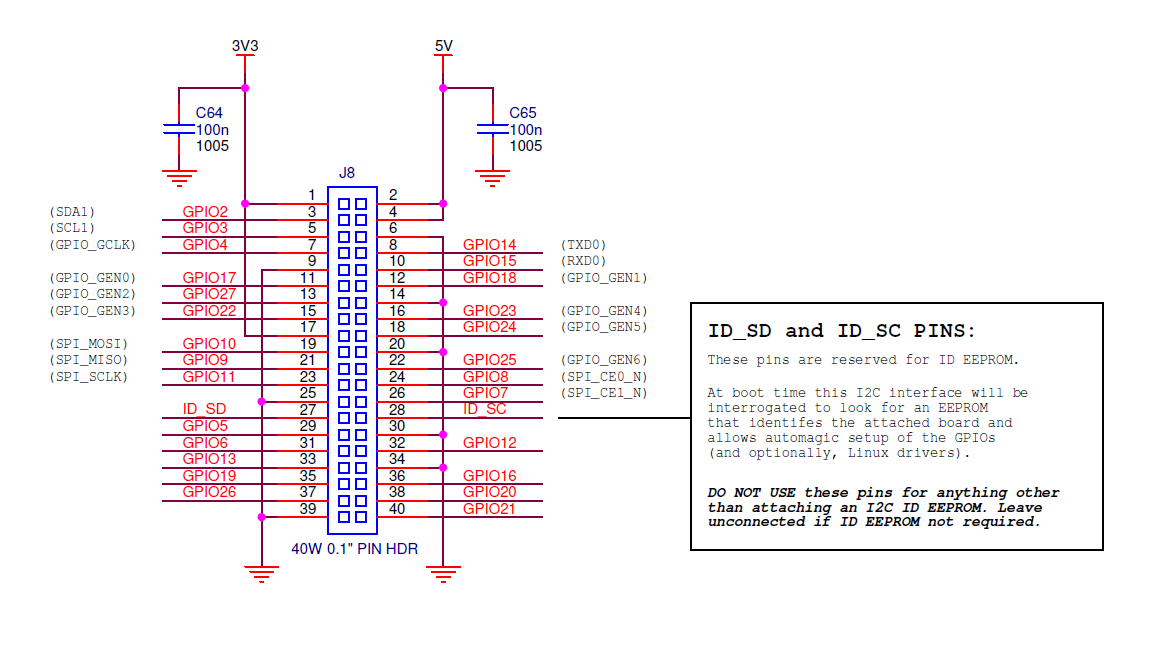
- The B+ sports a 40-pin GPIO header (compared to the B’s 26) and no longer has a P5 and P3 header. All the GPIO is on that one header now. The 26 pins to the left (nearest the corner) are backwards compatible so all your add-on boards will work (with the exception of any audio boards like the Wolfson which requires the P5 header which is, of course, not on the B+).
- 4 mounting holes, conveniently located on the corners of the board rather than the 2 oddly-placed holes on the B.
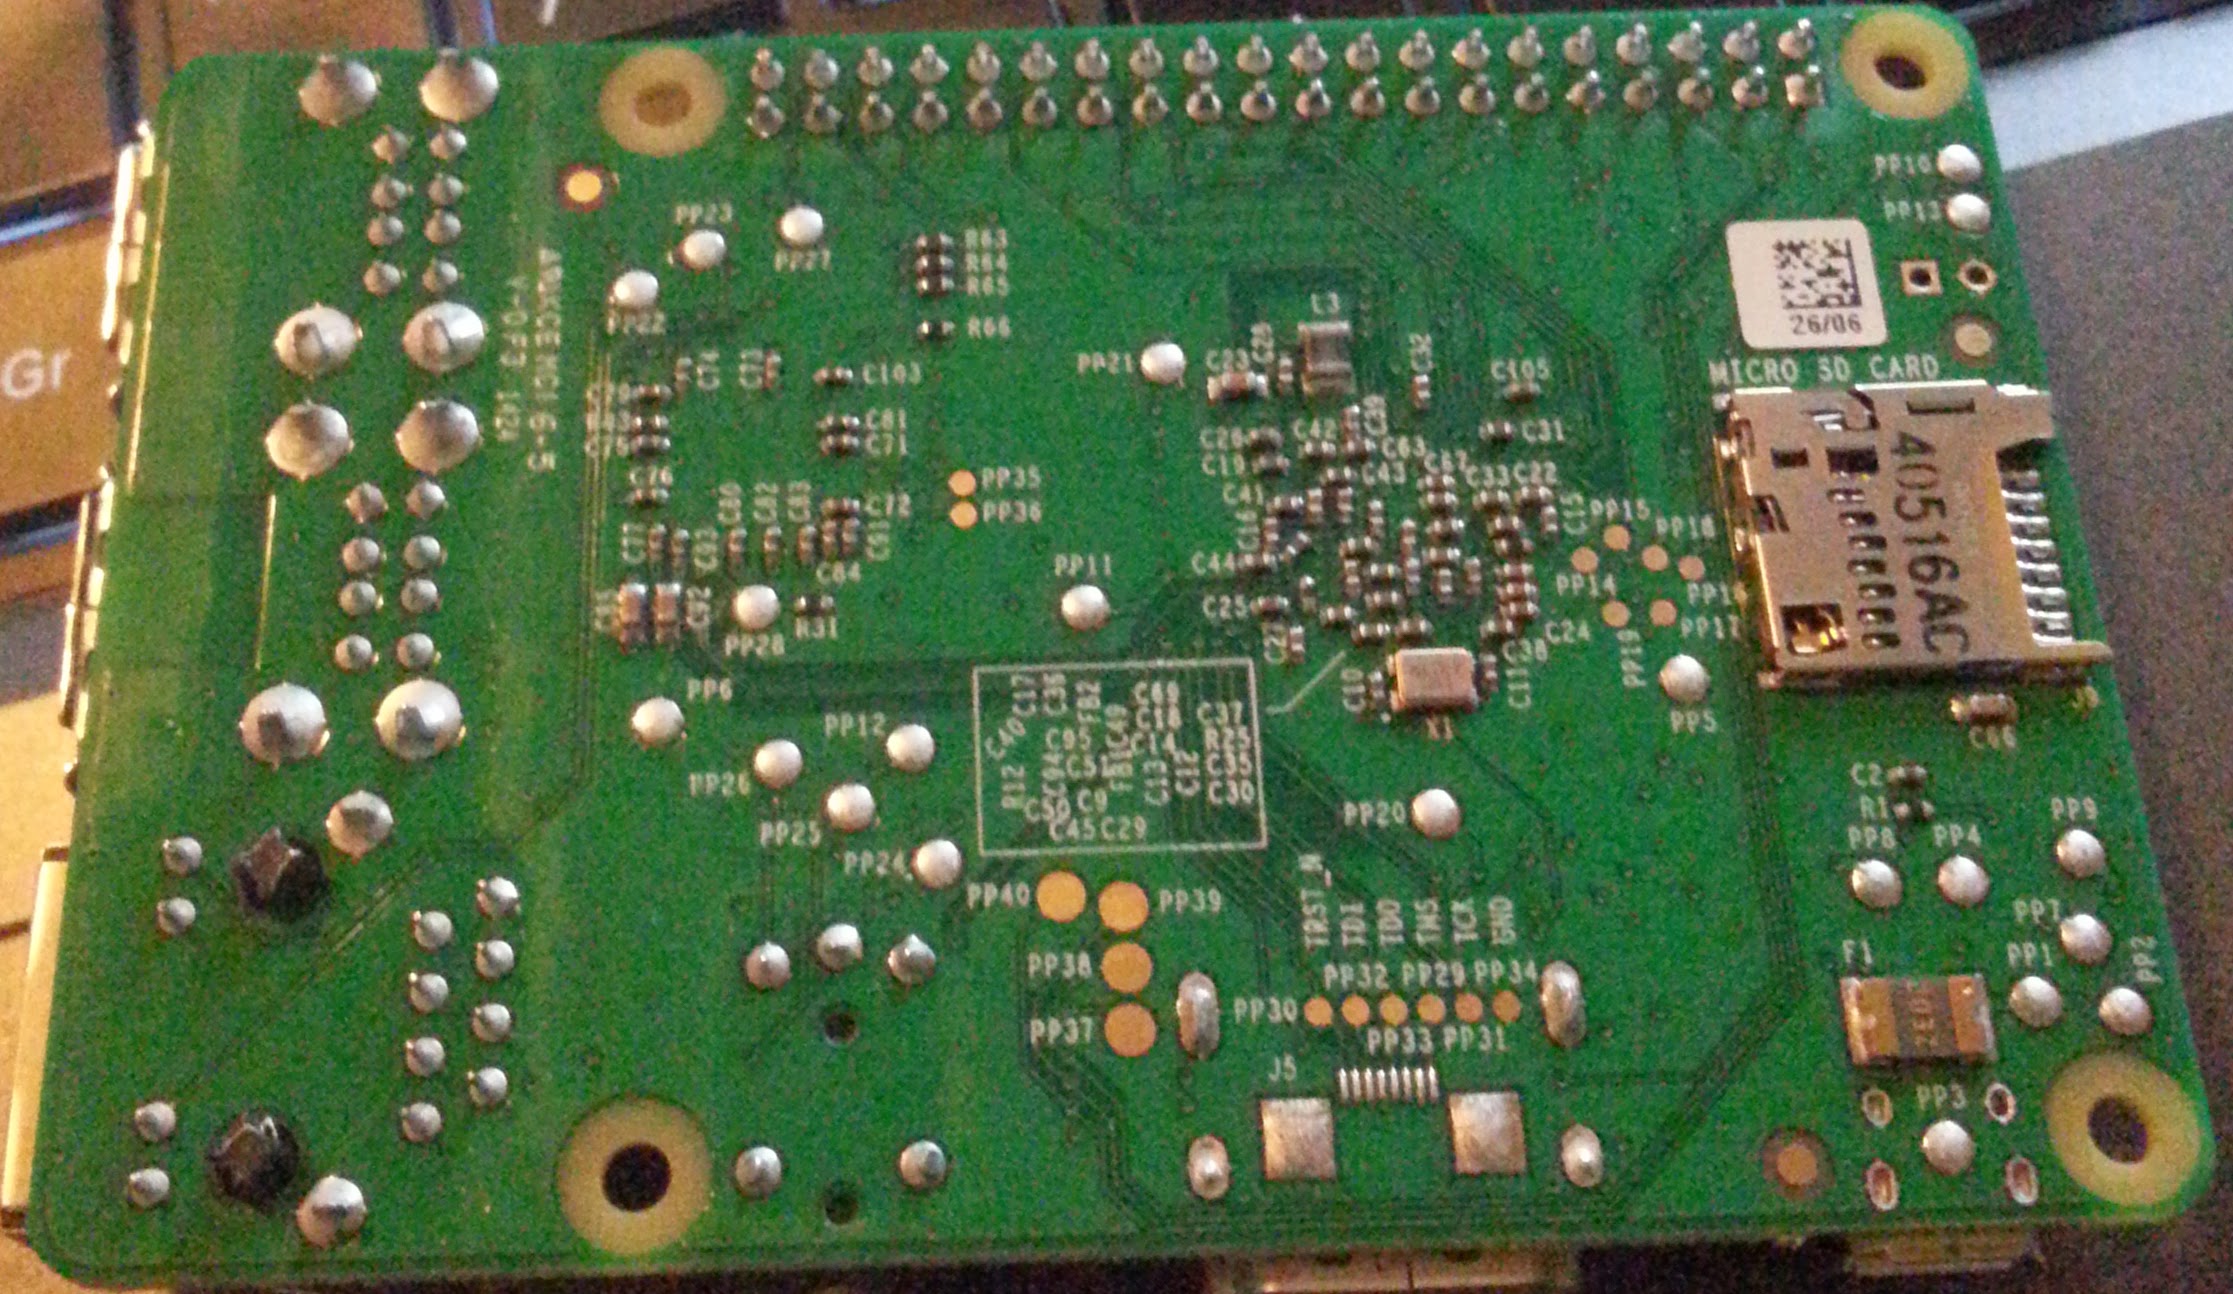
- On the back, the B+ uses a micro SD card (as opposed to the B’s full size SD card) with a push-push action (i.e. you push it in and it locks in place, you push it again and it clicks out). The card still protrudes slightly (presumably to make it easy to remove) but the (metal) slot is a vast improvement on the flimsy plastic of the B.
- Much clearer silk screen labelling in general.
- Lower power requirements – apparently it will use between 0.5 watts and 1 watt less than the model B.
- Much better audio output thanks to a dedicated power supply.
- Rounded corners! (Still doesn’t fit in an Altoids tin but who cares! The aesthetic change is welcome)
- The CPU (BCM2835), GPU and memory is still the same – there is no change in the overall architecture – this has been done for compatibility purposes and to keep the price point low.
- The price point is the same. $35 or £28 ish.
Here’s the pin diagram for the 40-pin GPIO header:
Here’s some close-ups of the board:

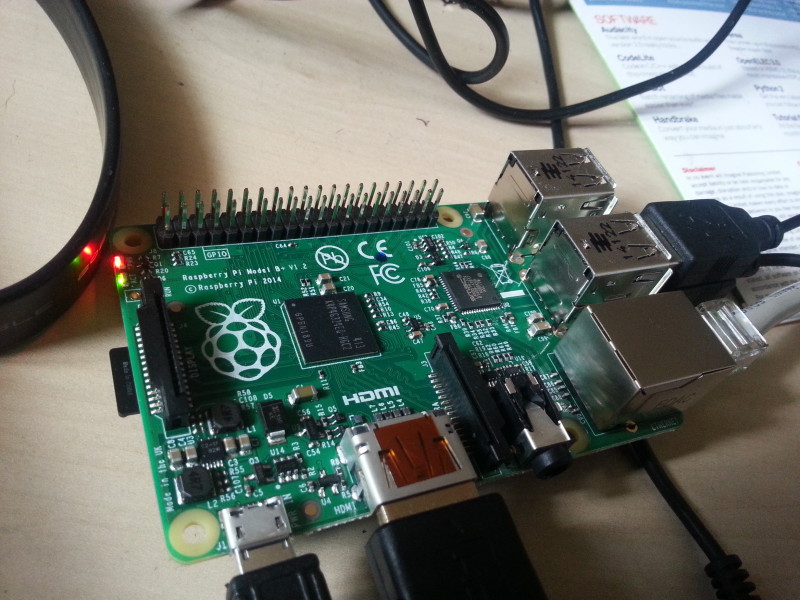
So, how does it work in practice? As you can see from the picture above, I powered it up (thanks to The Pi Hut for the 2A power supply!) with a brand new NOOBS card. Everything worked as per usual – I got the rainbow box up, the NOOBS flash screen and then the normal boot cycle. It just worked.
I decided the easiest way to prove the GPIO compatibility was to use a Pibrella:
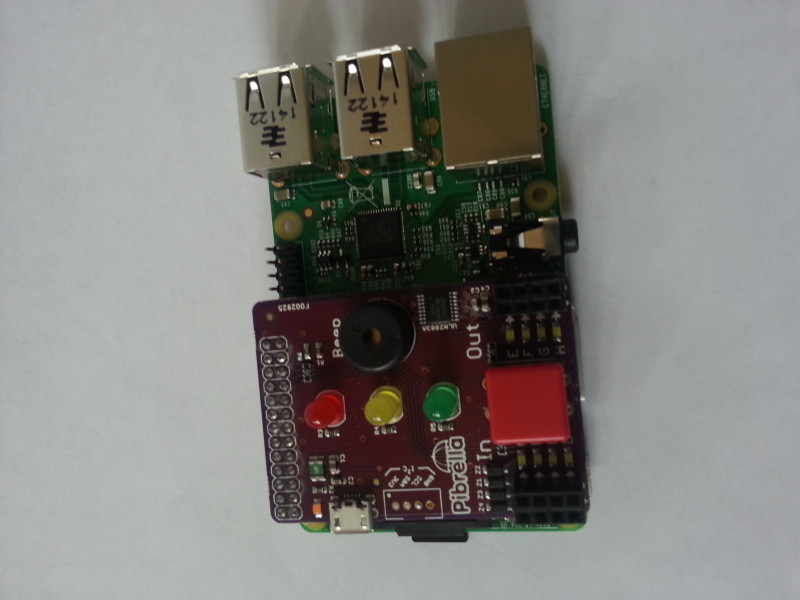

I wrote some quick-and-dirty Python and confirmed that the Pibrella does, in fact, work correctly, which is good. I also, as a sanity check, ran through the CamJam EduKit worksheets just to make sure they were okay. They were completely fine and operated as expected.
So, in conclusion, I’d just like to thank the Foundation for supplying me with the advance board – it was a real privilege to have a play around with the B+. I hope everyone finds the information useful – feel free to leave questions and comments!
For those of you who like more technical detail, here are some documents you may find interesting:
You can get hold of a B+ from Farnell (the Buy link doesn’t currently work though) and RS (the product is not listed yet) but I’m recommending getting it from The Pi Hut – they’re my local company (near Cambridge) and always reliable.
You can see other coverage of the board…
[…] Michael Horne Some huge news for you today. The Raspberry Pi Model B+ becomes available today – the Foundation […]
Hi Mike. I found this page through a link on a stackexchange page. Thanks for sharing the great information! The images on this page aren’t loading.
Thanks for the alert. Weird Im sure I host the imgs locally… Hmmm…