Lawrence has just blogged about how he turned his Raspberry Pi into a dock for his HTC Desire mobile phone.
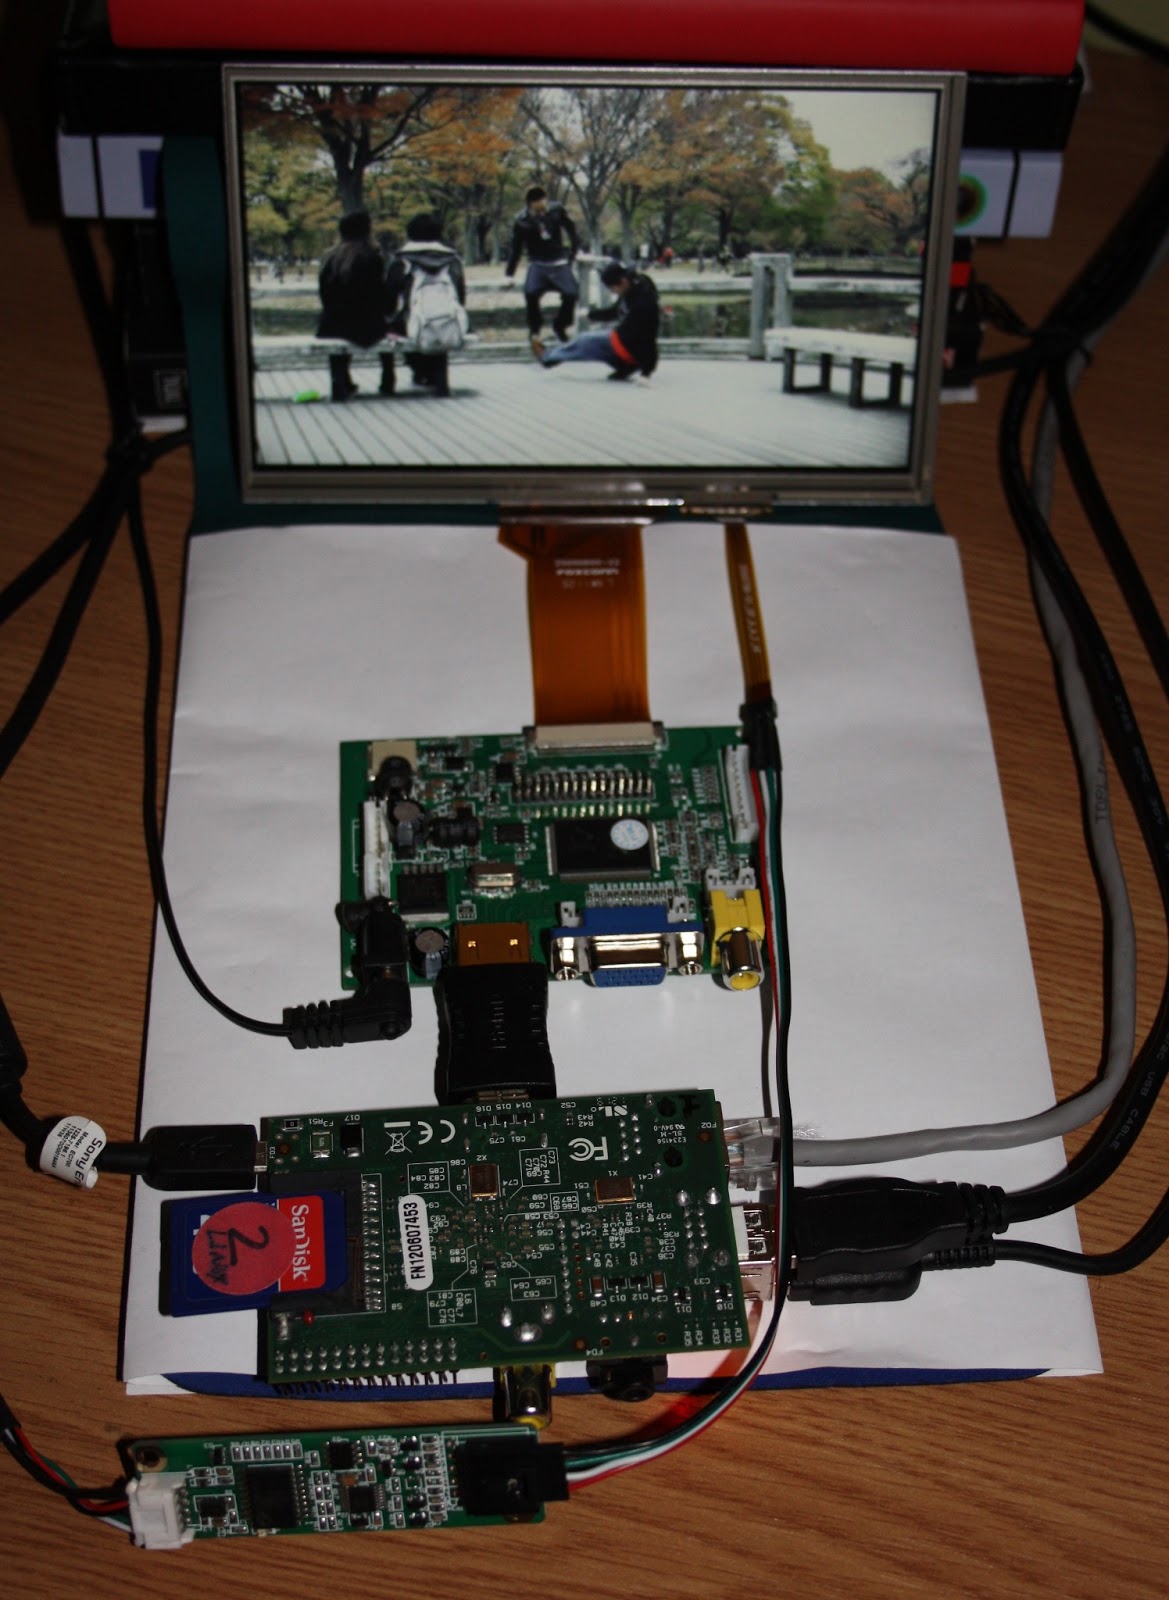
#RaspberryPi and eGalax 7-inch touchscreen for XBMC
Andrei Istodorescu has detailed how he put together a Raspberry Pi, Raspbian, XBMC and an eGalax 7 inch touchscreen for his project over on his blog.
Using a HMC5883L magnetometer/compass with the #RaspberryPi
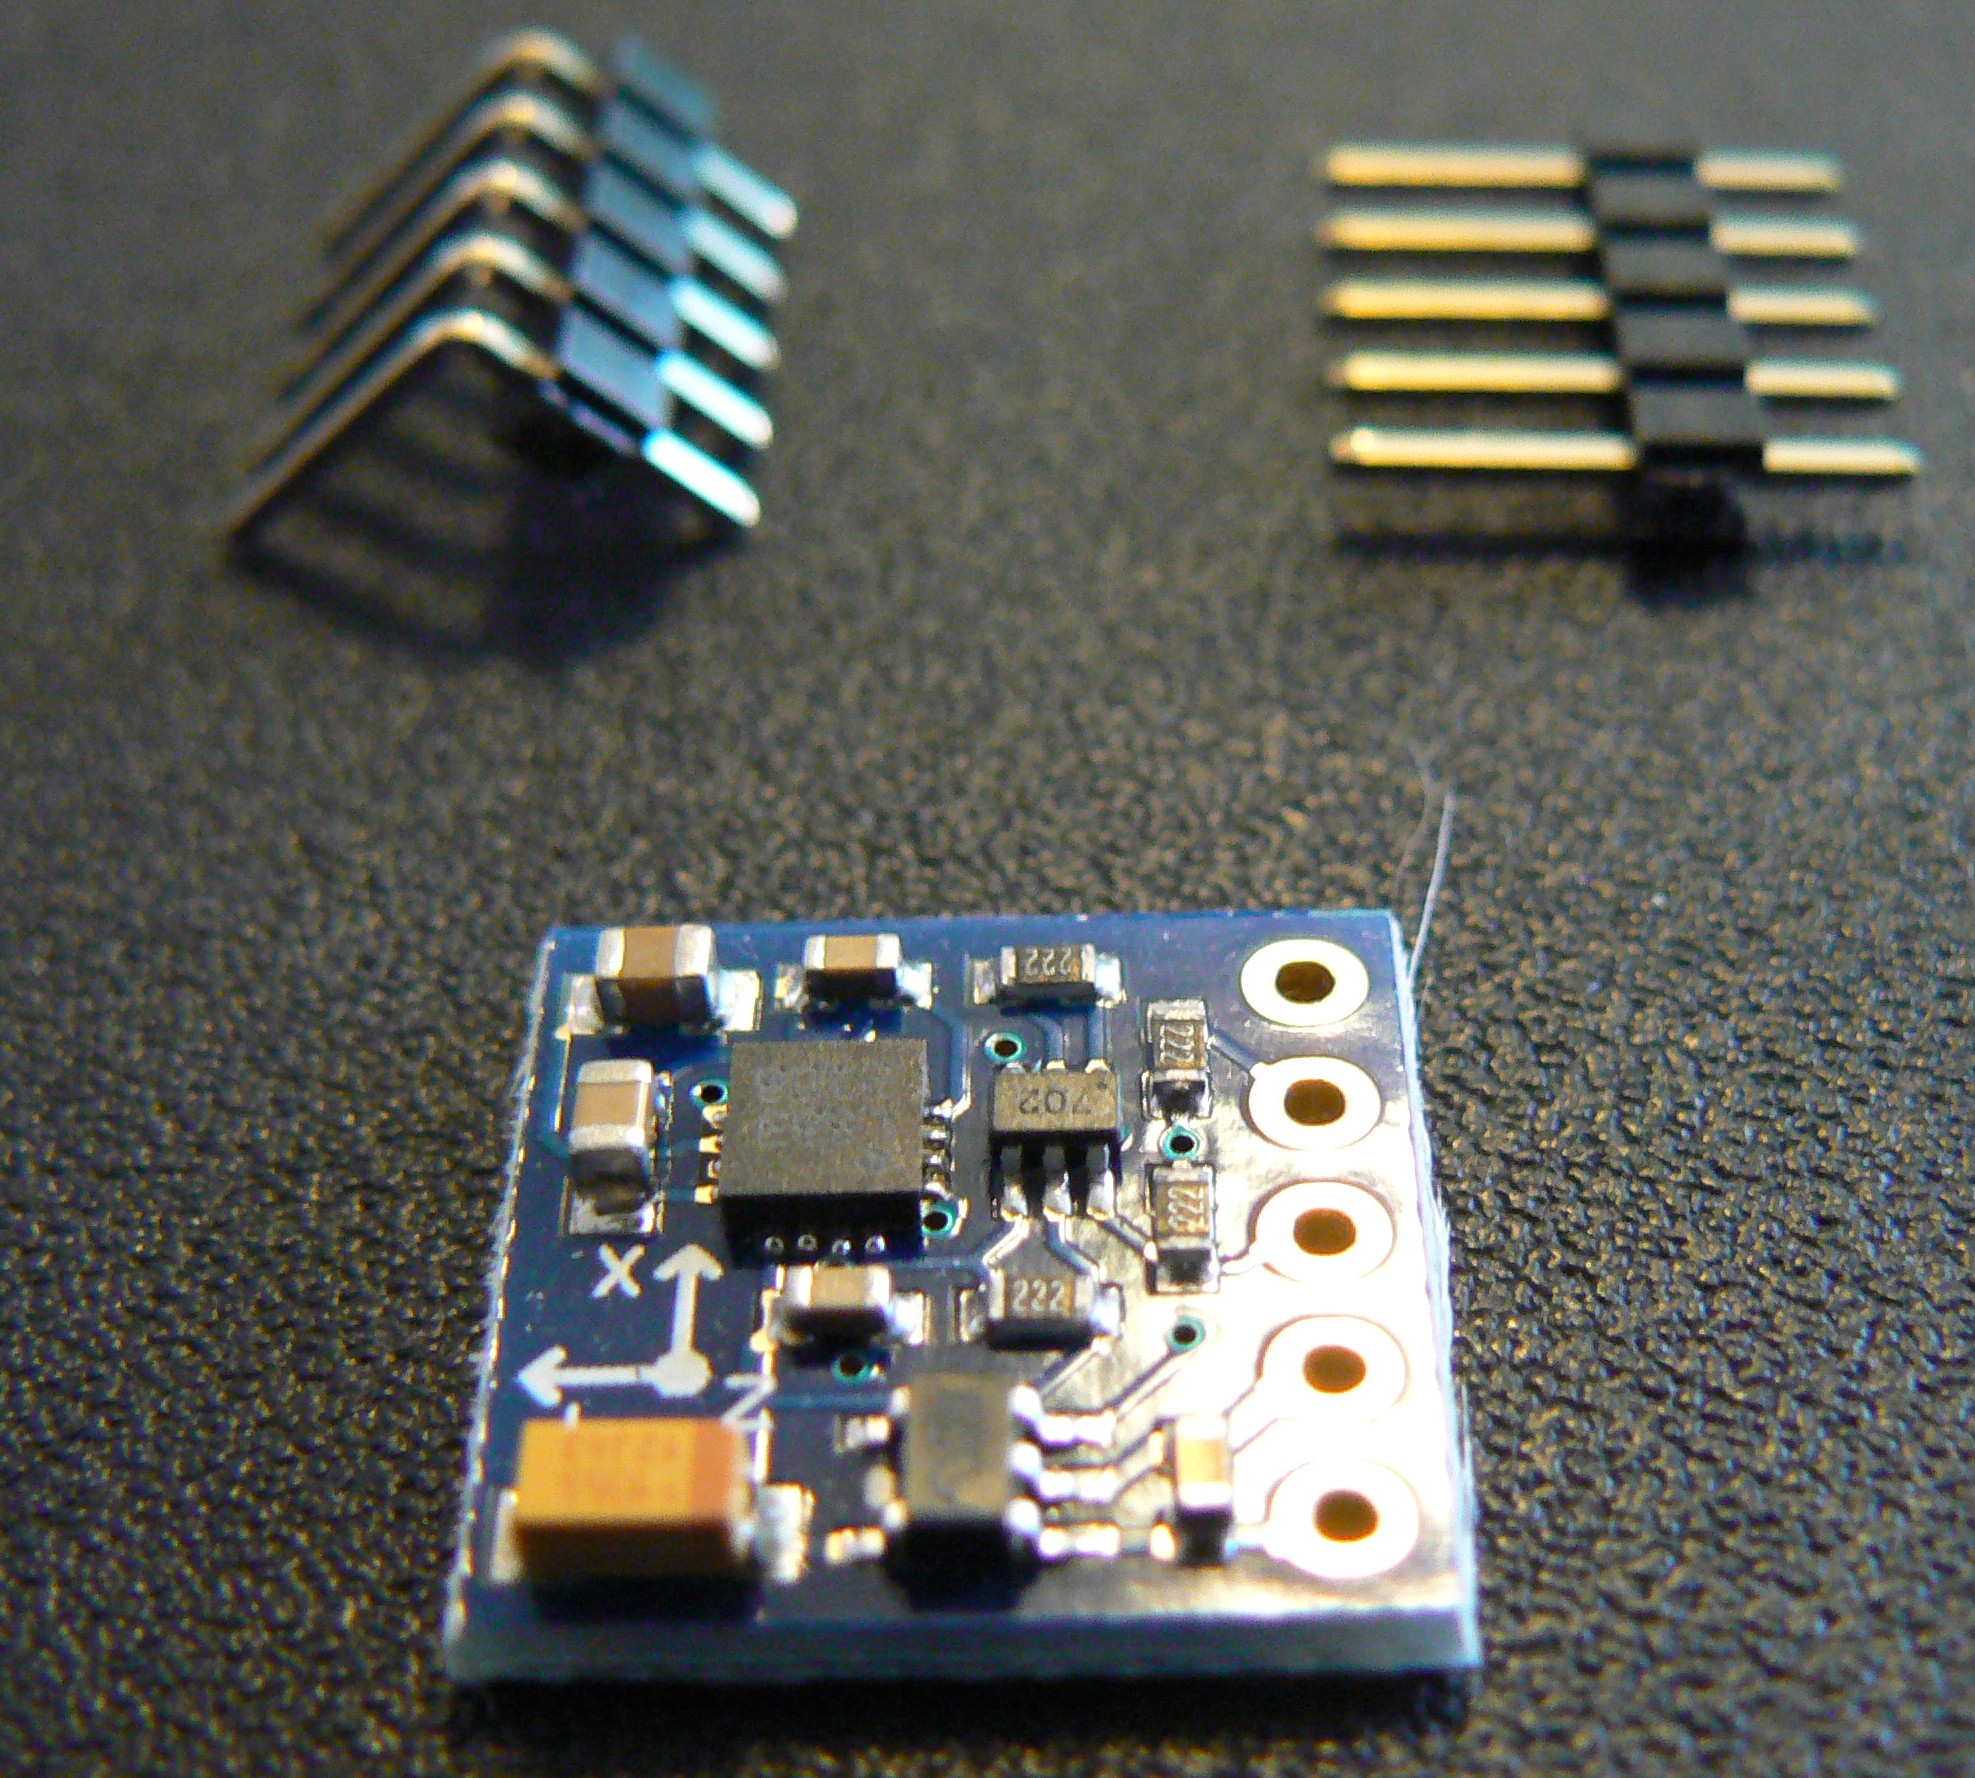
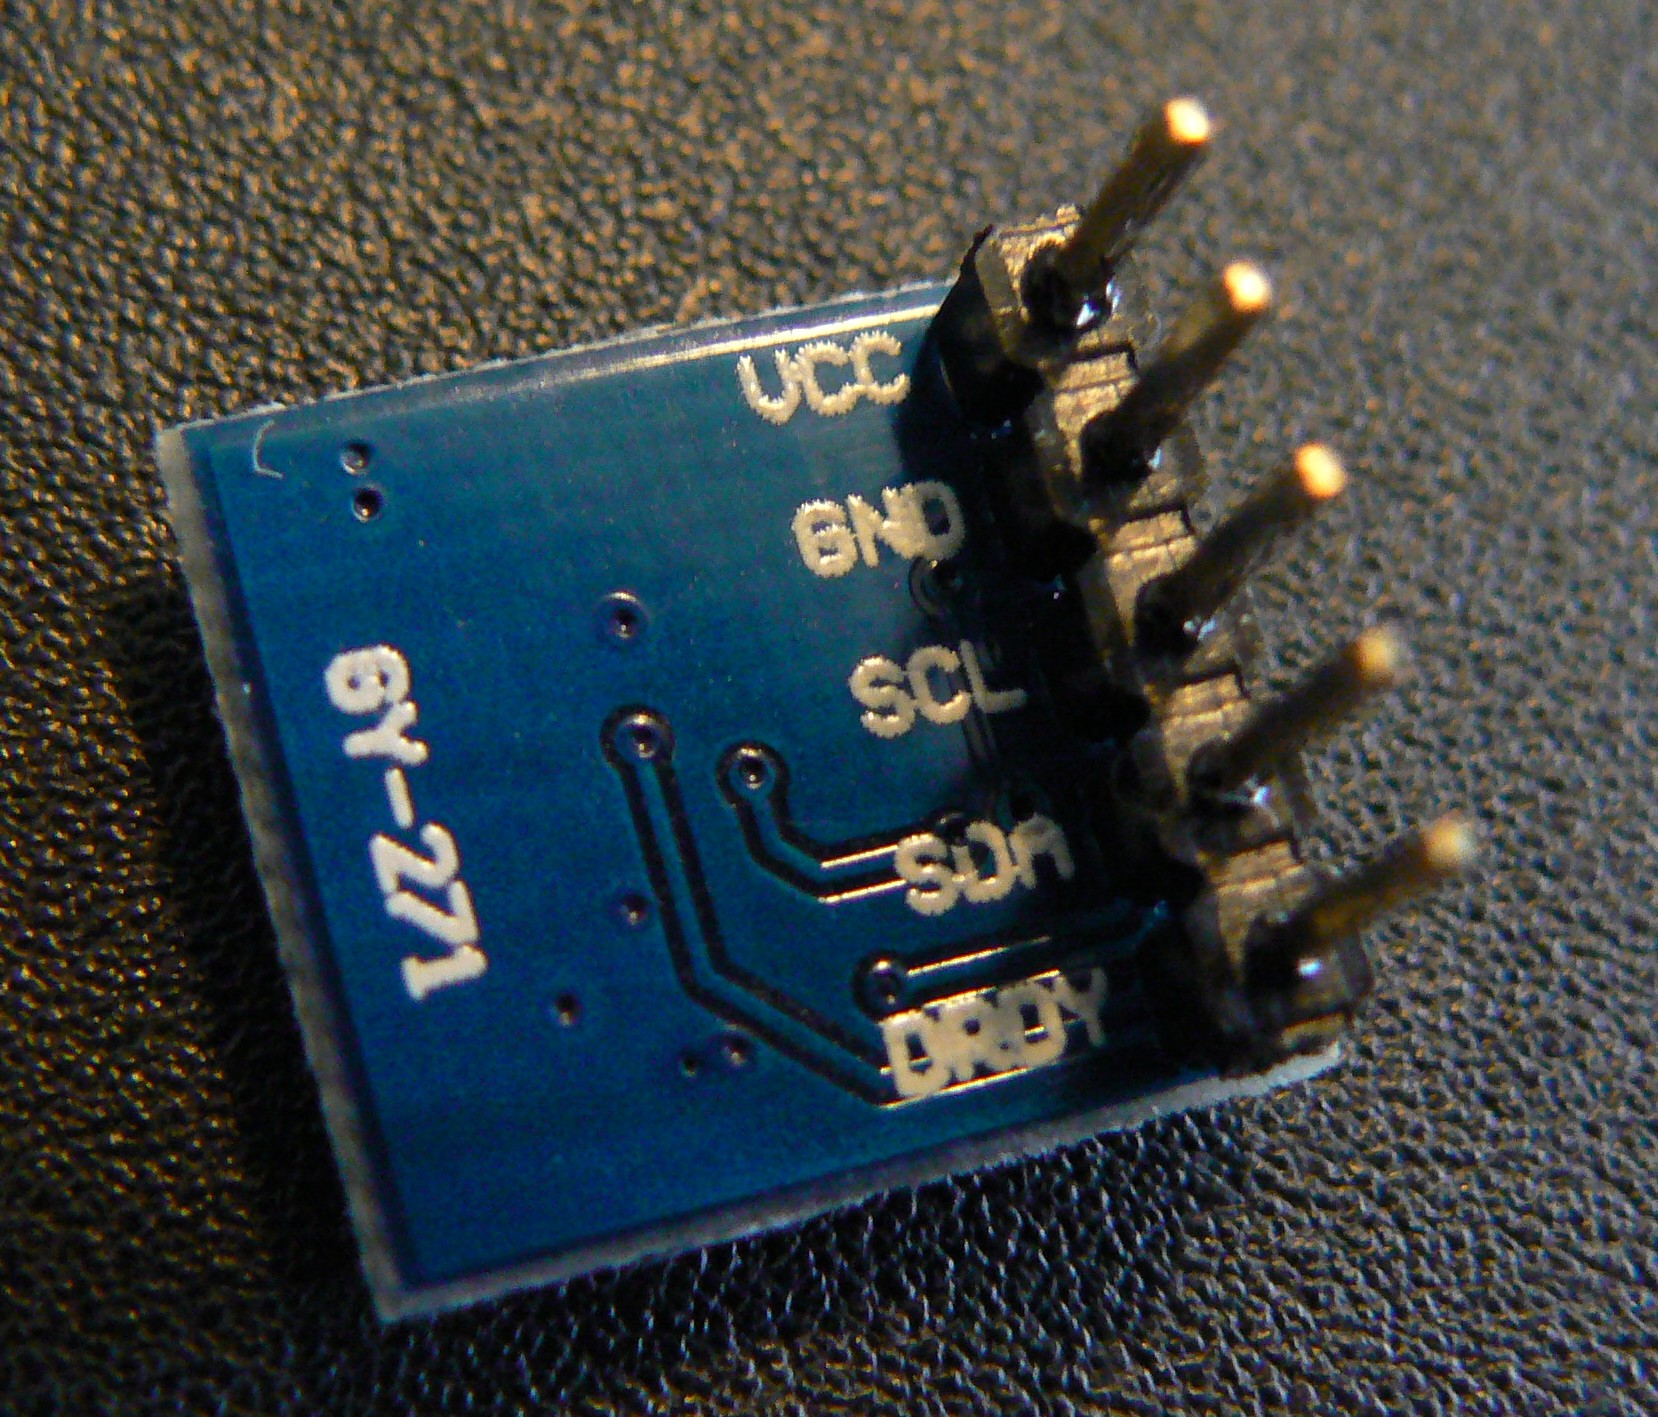
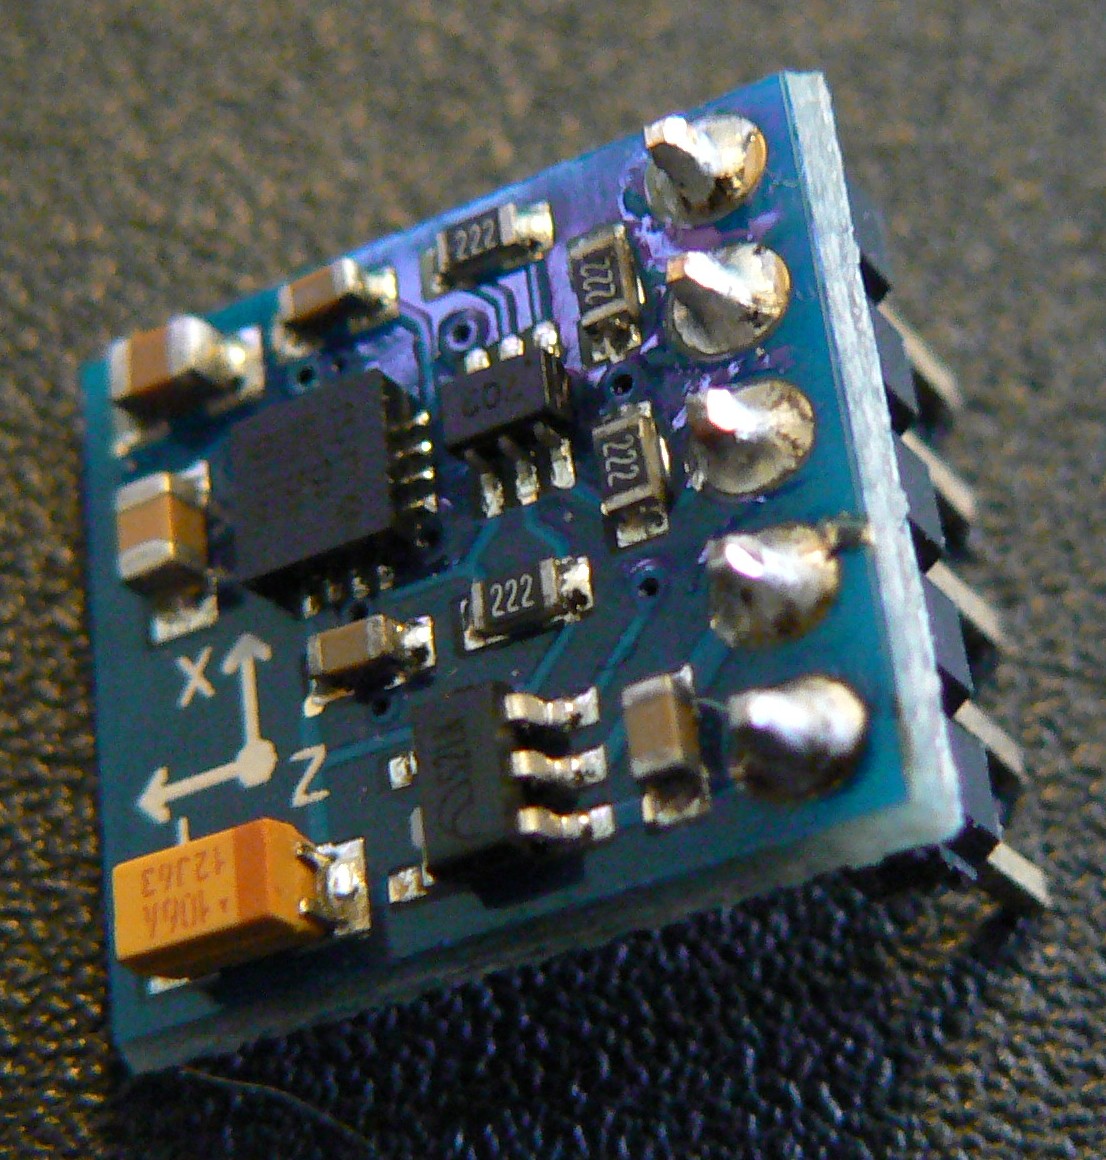
This blog post describes getting an HMC5883L magnetic compass sensor to work with a Raspberry Pi. The pictures below show the sensor breakout board in question.
 |
 |
 |
For Arduino Leonardo
If you do not have an Arduino, or just want the instructions for the Raspberry Pi, please skip this section.
I followed instructions from bildr.org to connect the board up to an Arduino Leonardo clone (the Dreamer Nano v4). For the Leo, the I2C ports are D2 (for SDA) and D3 (for SCL). Power supply for the board is 3v3 and you also need to connect up the ground pin. The DRDY pin is not used. I downloaded the Arduino library and examples package from the bottom of that post (http://code.bildr.org/download/976.zip) and wired it up like so:
- VCC -> 3.3v
- GND -> Ground
- SDA -> D2
- SCL -> D3
I used the Arduino IDE to upload the example sketch and opened the serial monitor from which I got the following readings:
Raw: 31 407 -587 Scaled: 28.52 374.44 -540.04 Heading: 1.54 Radians 88.26 Degrees
As I rotated the breadboard on which the sensor was mounted, the readings changed.
For Raspberry Pi
First of all, make sure your Pi has I2C installed and enabled. This is a bit of a trial if you don’t know what you’re doing, but if you have any problems, leave me a comment. Follow these instructions to find out how to do it. After running the last command:
i2detect -y <port>
you should get a value in one of the “cells”. For instance, I get a “1e” reading in the 10/e cell.
Secondly, install the ThinkBowl I2C libraries. Please note, take notice of the fact that for these libraries you need to use Python 3, not just plain Python.
Next, find your magnetic declination by using this site.
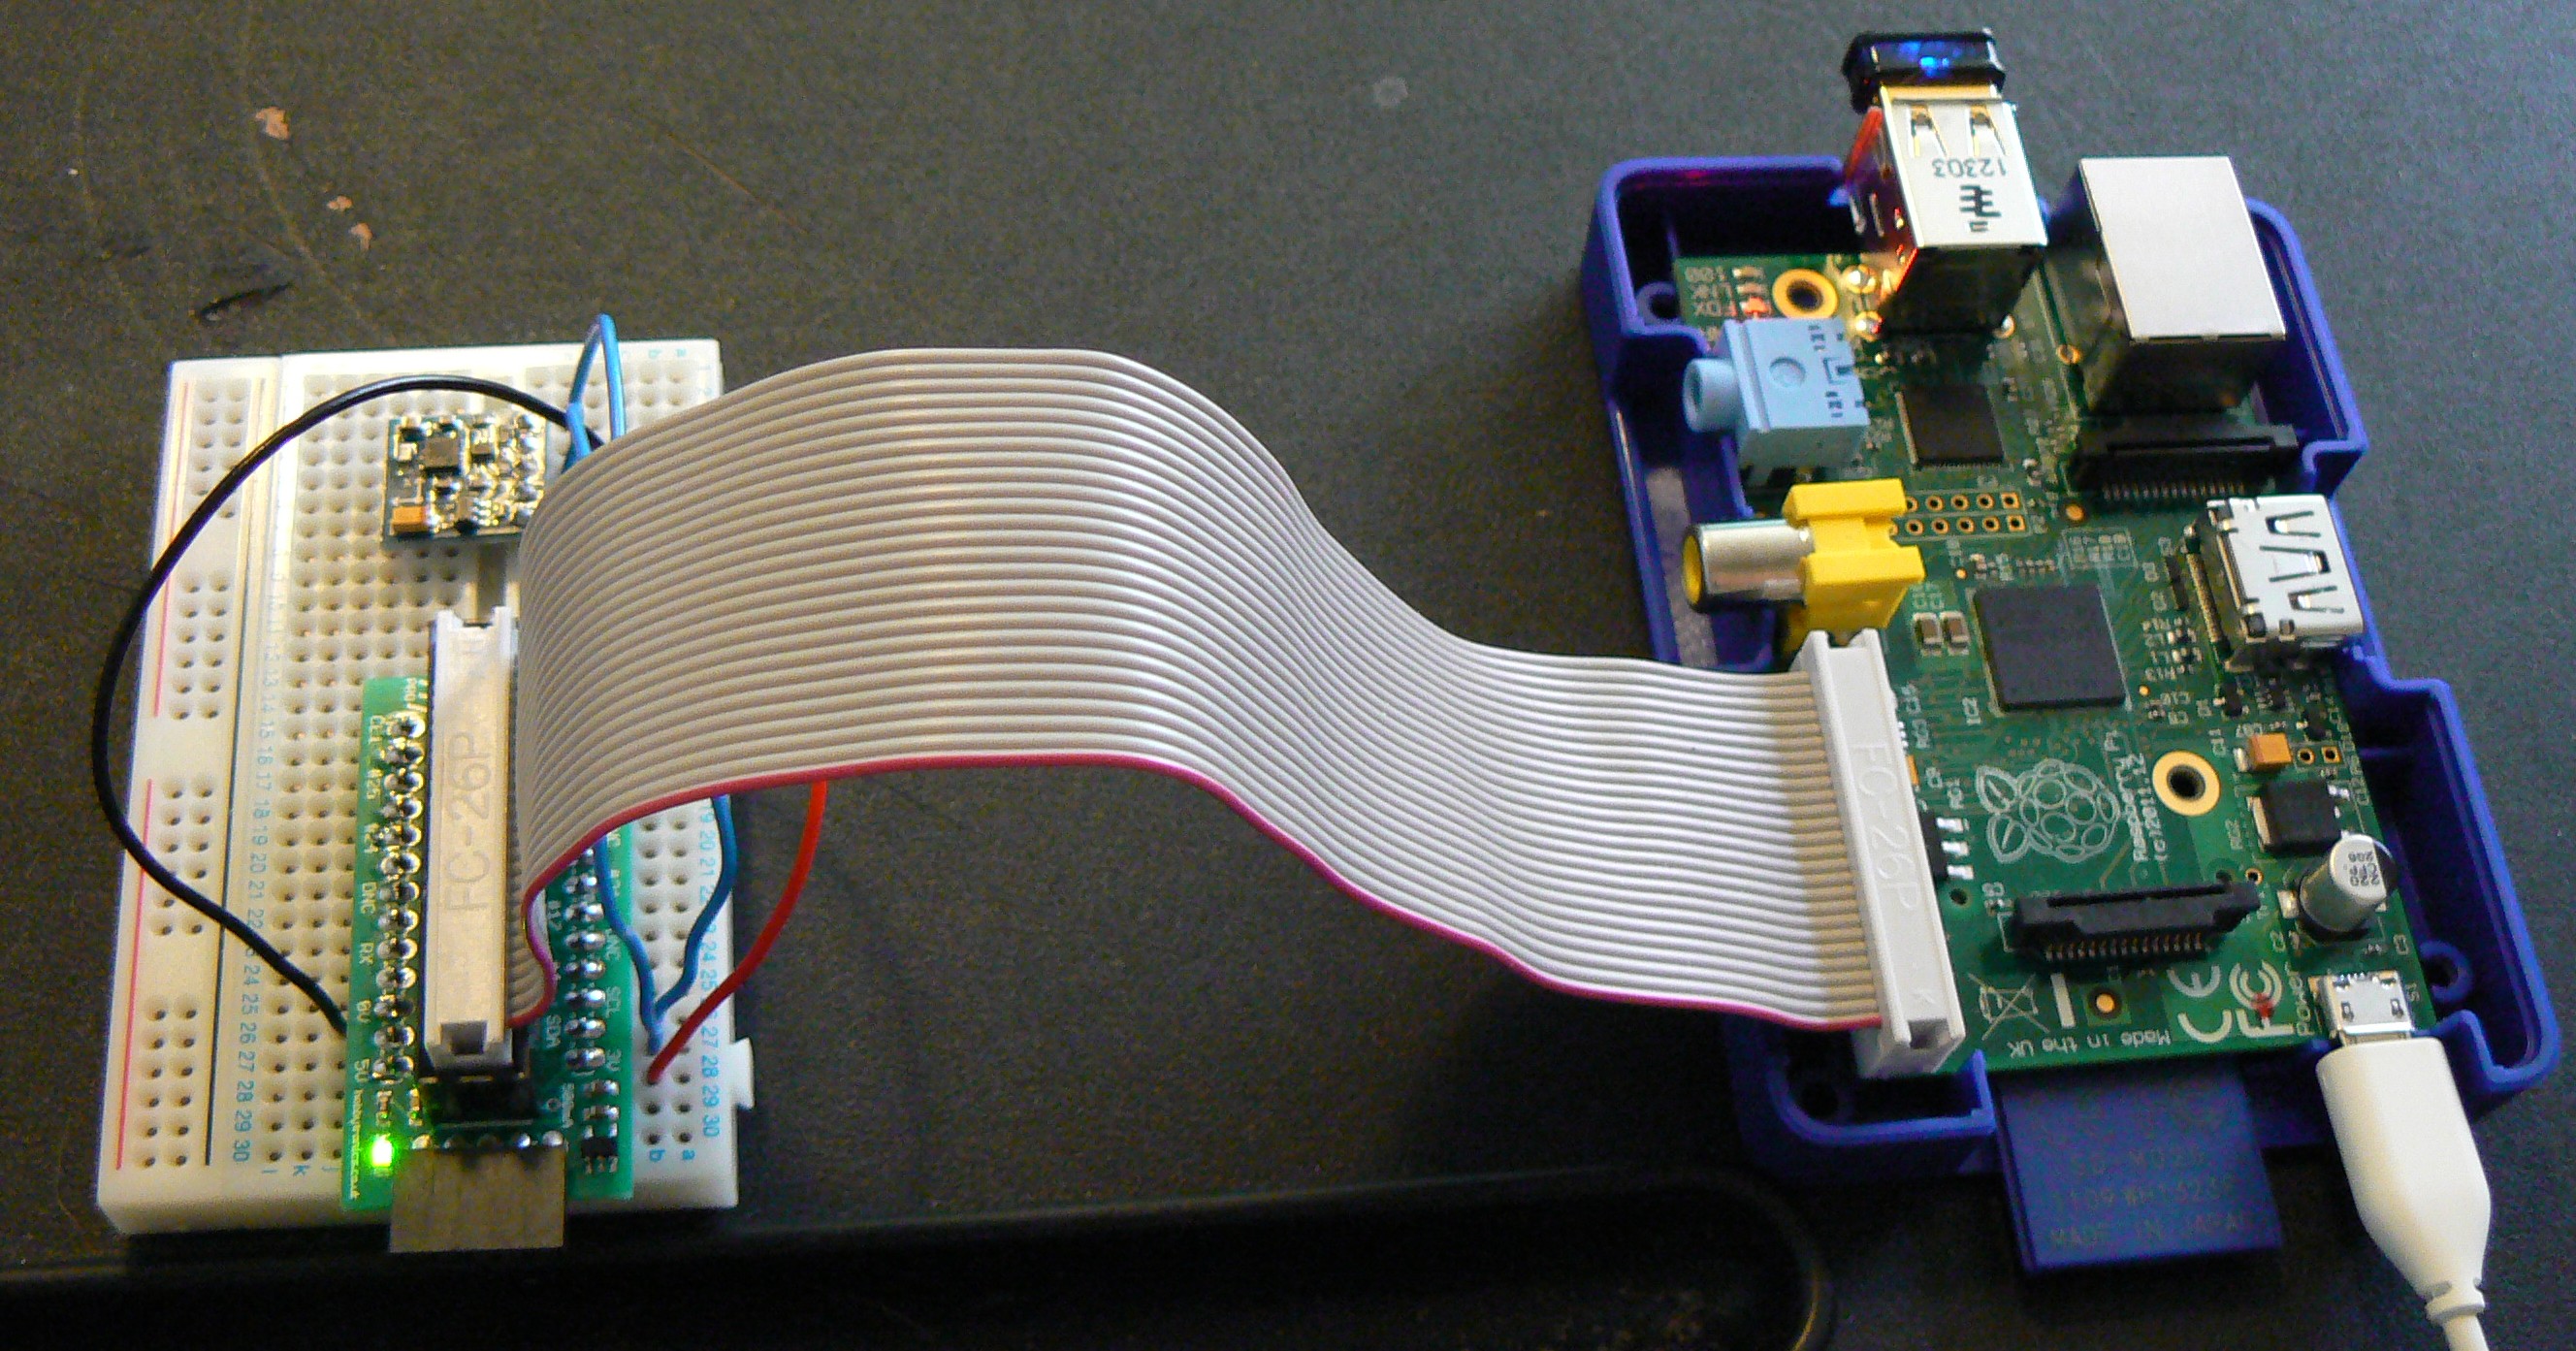
Now connect up the sensor board. I used a breadboard and a Hobbytronics GPIO breakout connector, but you can connect it directly to the Pi’s GPIO pins. Here are the pin-to-pin mappings from the Pi to the board. Remember that Pin 1 is the 3v power connector on the Pi’s GPIO so you can count from there.
Pi pin number       Pi pin name        HMC5883L pin name
--------------------------------------------------------
1                   3V3                VCC
6                   Ground             GND
3                   SDA                SDA
5                   SCL                SCL
Next, use the basic Python example from here (or see below) and run it with python3 (for example python3 test-sensor.py) and you should get X,Y,Z axis readings and your heading in degrees and minutes. Rotate the board and you should get different readings
#!/usr/bin/python3
from i2clibraries import i2c_hmc5883l
hmc5883l = i2c_hmc5883l.i2c_hmc5883l(1)
hmc5883l.setContinuousMode()
hmc5883l.setDeclination(9,54)
print(hmc5883l)
NB: If you get an input/output error, try changing the first line to:
hmc5883l = i2c_hmc5883l.i2c_hmc5883l(0)
Lastly, if you have problems getting these instructions to work, please leave a comment or use my contact form
to ask questions.
Here, for interest, is what my Pi looks like when connected up to a breadboard with the sensor board on it.
Resources used for this blog post
- Chris Fane’s blog with a basic idea of what we’re trying to do. Ended up not using it as it wasn’t a fully fledged example.
- Raspberry Pi library from Think Bowl using Quick2Wire’s I2C base library.
- Blog on bildr.org to get the sensor working with an Arduino
- Datasheet on the sensor with reference to a similar breakout board. This isn’t the original datasheet, but it’s very interesting to read as it describes how the main chip works with a similar breakout board.
- Datasheet for the sensor itself, just for reference.
Installing and enabling I2C on the #RaspberryPi running Raspbian
![]() I’m rather cheekily taking most of this from ThinkBowl.com as it’s a brilliant, simple walk-through that I’d hate to lose if the site disappeared! I’ve added some comments by way of explanation, just to add a little value.
I’m rather cheekily taking most of this from ThinkBowl.com as it’s a brilliant, simple walk-through that I’d hate to lose if the site disappeared! I’ve added some comments by way of explanation, just to add a little value.
- First install the i2c-tools:
apt-get install i2c-tools - Next SPI and I2C is “blacklisted” (i.e. turned off) from modprobe (the module loader) by default. Edit /etc/modprobe.d/raspi-blacklist.conf with vi or nano and comment out (place # as first character on line):
blacklist i2c-bcm2708 - To ensure modules are loaded at boot add the following lines to /etc/modules:
i2c-bcm2708
i2c-dev - Optional: If you are going to access the I2C from users other then root create a file called /etc/udev/rules.d/99-i2c.rules with the following line:
SUBSYSTEM==”i2c-dev”, MODE=”0666″
This will allow access from every user. To allow access only from a specific group:
SUBSYSTEM==”i2c-dev”, GROUP=”input”, MODE=”0666″ - Reboot the pi by issuing:
reboot - After the reboot, verify that the I2C devices are available:
ls /dev/i2c* - Optional: If you are using I2C with Python, you will need the smbus python library as it is not installed by default:
apt-get install python-smbus - Once you have the I2C device attached, you can determine the address by running:
i2cdetect -y <port>
Replace <port> with 0 for Revision 1 Raspberry Pis and with 1 for Revision 2 boards.
#RaspberryPi Fish Tank Monitor (work in progress)

Just thought I’d share this discussion forum thread in which a Raspberry Pi enthusiast called Rob is attempting to build a fish tank monitor out of a Raspberry Pi and some expansion boards.
RasPi.TV covers the #RaspberryPi TARDIS launch

Alex Eames was able to take some video of Dave Akerman and Anthony Stirk’s high altitude balloon launch on Wednesday. It’s a great video as usual from Alex who shows the sheer amount of elbow grease that goes into launching one of these balloons.
Watching from 1:50 gives you a peak inside the Pi equipment itself, although frankly I wouldn’t skip any of it! The video covers everything, from unloading the van through launch, monitoring and recovery.
The opening music made me chuckle 🙂